Here's another room I like. Just add it to the "help me figure out my style" category, like these images. I found this at Virginia Johnson's via Oh Joy!
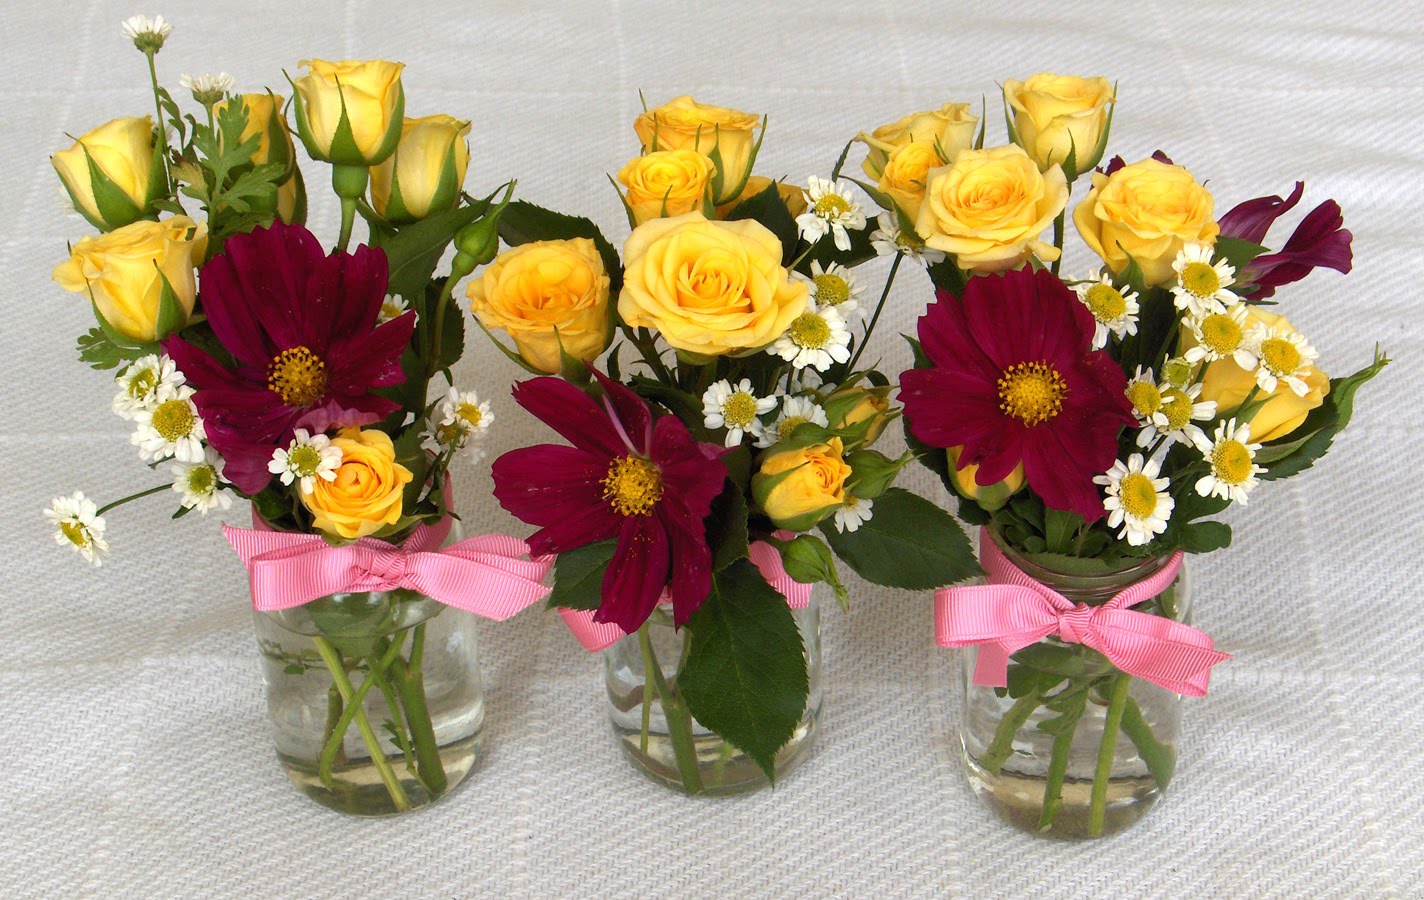 I have been saving baby-food jars for a while. It's pretty crazy but they are just so cute and I don't recycle glass. I decided a baby shower is the perfect occasion to decorate with these. However, I also used these for our bedroom makeover. They would be perfect down the center of a long table. To make these arrangements:
 I wish I would have made more of these tea-light candle holders. When it got darker, they really set the mood. They are really simple:
 My husband's biggest request is we had to keep the brown comforter. I wanted to get a new bedroom set but we couldn't afford to replace any of the furniture. So, after I got help choosing a color palette, this is what I came up with.
 BEFORE
 AFTER
AFTER BEFORE
 AFTER
AFTER BEFORE
 AFTER
AFTER
 As I am putting the final touches on the bedroom, I noticed I needed a little color on the dresser. Since I don't have any funds I made due with what I have - dollar store candles, stamps, scraps of paper & fabric. This is what I came up with. Here are the materials.
 Don't forget to come back Monday to see the completed room!
 This was my last project...pillow covers. I wasn't sure if I would have time last night. I started working on them at 11:15. A few minor distractions later it was 11:45 and I was done! Follow my envelope pillow cover tutorial and let me know if you have questions.
 This is the back. Can you see the edge I folded over to fit my pillow in? One reason it went so fast for me is I used the selvage edges of my fabric so I only had to sew two sides on each pillow. I just sewed down the sides after I had made the correct folds. It was a breeze. I'd love to hear what you think of my tutorial. Is it confusing?
 Mine have a ruffle top, if you want it straight, start with fabric that is 7 inches longer than you want your curtains and fold down 2 inches on the top instead of four. Then skip the last step.
 My hem is actually only 3 inches, although my directions say to make it four. For a longer or shorter hem, adjust the length of your fabric before you start sewing.
  I hope this gives you a little visual. Any questions?
 Sometimes I put up with ugly things because I forget...I can make it pretty! These storage boxes have been above our bedroom closet for a long time. When I saw this idea from the Make It and Love It blog, I decided to make my storage boxes look pretty too. I used pretty paper to cover up the ugly. Much better.
  Here is my label. You can scale it down and make some of your own. The bedroom is getting closer...
 Can you tell that I love spray paint? Here is another frame I spray painted. I found 2 matching frames at Deseret Industries and did the same for both. Go here for instructions. I was going to put my hubby's and my initials in them. I decided not to because I thought it might be a lot when they are grouped with this silhouette artwork I did. So, for the artwork, I just cut a little piece of scrapbook paper. One more project down for the bedroom.
 I am really happy with how the night-stands turned out. My husband's parents gave us two sturdy night-stands for our first Christmas as a married couple. They have held up well and matched our other furniture. Now that I decided to paint the other furniture, I wanted these to match with the same paint color & new hardware. It was easy and rewarding. Any how-to questions?
 BEFORE
 AFTER
AFTER